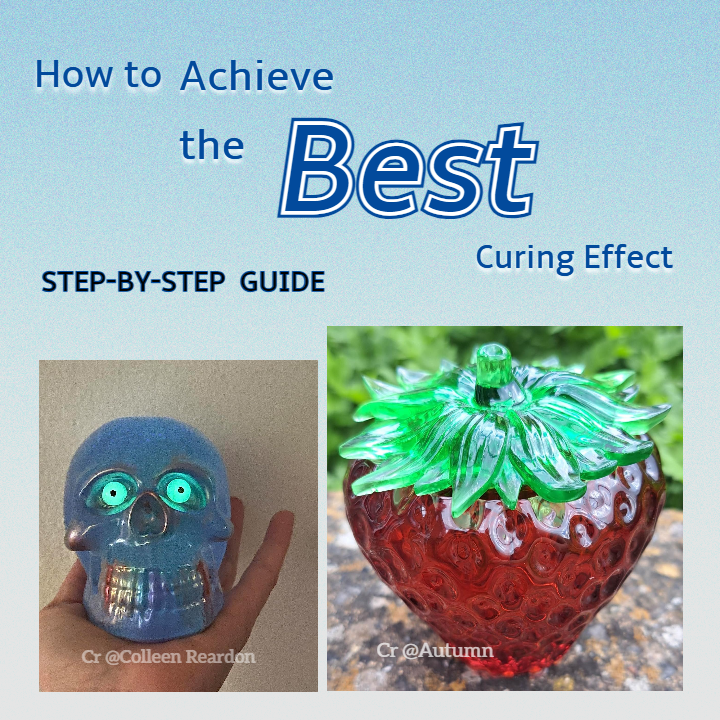
?
Epoxy resin cannot be cured well, soft/bendy/sticky?
Epoxy resin fails to achieve a glossy surface?
In this blog post, we will guide you through the process step-by-step, helping you create beautifully cured epoxy resin projects.
Step 1: Measure Accurately
Start by measuring equal parts of epoxy resin and hardener. Use a scale or measuring tools to ensure the right ratio. Accuracy is crucial for proper curing, so take your time to measure precisely.
 |

|
If you are not sure how much you should measure for your work, please refer to the Resin Calculator.
Step 2: Prepare
- Before starting, clean and prepare your workspace.
- Ensure good ventilation to minimize exposure to fumes. A well-ventilated area will help dissipate any odors emitted during the curing process.
- Ensure the mould is clean and dry so as not to interfere with curing.
Step 3: Thoroughly Mix the Resin and Hardener
- Combine the measured resin and hardener in a mixing container. Stir slowly and consistently for approximately 2-3 minutes.
- Scrape the sides and bottom of the container to ensure complete and thorough mixing.
- You can color and add any decorations you want after this step.
Note: If adding liquid pigments, be careful not to add more than a maximum of 6% of the resin mixture as this may affect the curing effect.

|
 |
Step 4: Check for Air Bubbles
- Allow the mixture to rest for a few minutes after stirring. During this time, any air bubbles will rise to the surface.
- To eliminate them, use a heat gun or torch to gently pass the flame over the resin surface.
- Alternatively, you can consider using a vacuum chamber to remove bubbles before pouring.
Step 5: Pour and Level
- Pour the mixed epoxy resin onto your desired surface or into a mold. Ensure even distribution of the resin to achieve a level and smooth finish.
- A spreader or foam brush can help with this process.
- Take your time to ensure the resin is evenly spread across the project. If you are having problem getting a level operating surface, you may consider purchasing a Teexpert leveling board.

|
Step 6: Remove Additional Bubbles
- After pouring, observe the surface for any additional air bubbles that may rise. Use a heat gun or torch again, carefully passing the flame over the resin to eliminate these bubbles. Exercise caution not to overheat or scorch the resin while doing so.
- Or spray the surface with 99% alcohol. Be careful not to use too much as it may affect the curing.

|
 |
Step 7: Allow Proper Curing Time
- Refer to the instructions for the recommended curing time and temperature.
- Generally, epoxy resins require 12-72 hours to fully cure, depending on the specific type.
- Ensure the curing temperature remains within the recommended range for optimal results.
Step 8: Protect from Dust and Debris
- While the epoxy resin cures, protect the surface from dust, debris, and any disturbances that may affect the finish.
- Consider covering the project with a dust-free enclosure or utilizing a dedicated workspace to prevent unwanted particles from settling on the resin.
Step 9: Optional Post-Curing
Some epoxy resins benefit from a post-curing process. This involves applying controlled heat or leaving the cured project in a warm environment for an extended period. Review the manufacturer's guidelines for specific post-curing recommendations, as this step may enhance the resin's final properties.
Conclusion:
By following these step-by-step instructions and guidelines, you can achieve the best curing effect with any epoxy resin systems.
Remember to prioritize safety by wearing appropriate protective equipment and working in a well-ventilated area.